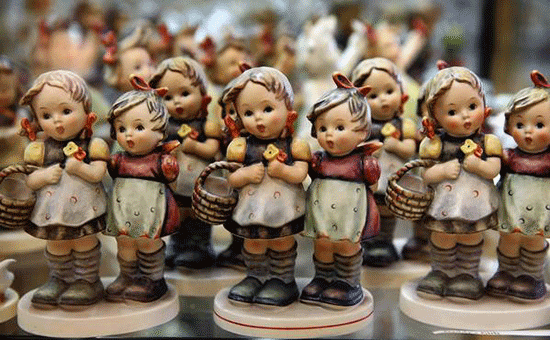
M.I. Hummel figurines have been handcrafted in the same Rödental factory since 1935. The process they use, not only provides us with the gorgeous figurines that we see today. It is also the reason for why they are able to provide the high standards of quality and craftsmanship, that they have come to be known for.
The Hummel manufacturing process – or Hummel Manufaktur as it is known in Germany – has not changed much over the decades. The same techniques and methods that were first used back in 1935 are still being used today. With many of the current artisans, having crafted Hummel figurines for decades.
Contents
The Design Process
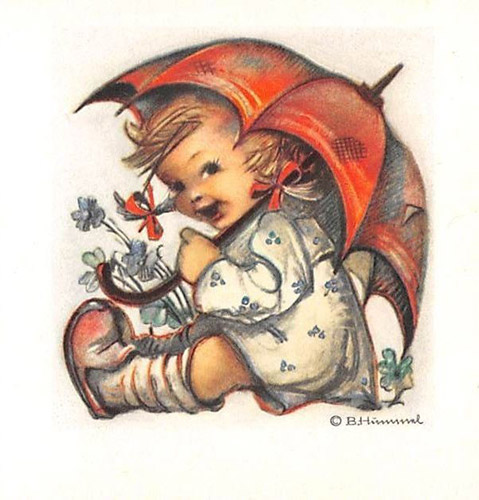
All Hummels start out as two dimensional art work that was made by renowned artist Sister Maria Innocentia Hummel. While she was teaching at the convent of Siessen in Saulgau, Germany. Sister Maria Innocentia would sketch drawings inspired by the children that she was teaching. Her art style has the children wearing over sized shoes with baggy socks, and rosy plump cheeks. It was this art style that drew the attention of Franz Goebel, back in 1934. For more information on the relationship between Sister Maria Innocentia Hummel and the Goebel company, see our article The History of Hummel.
Step 1) Clay Sculptures
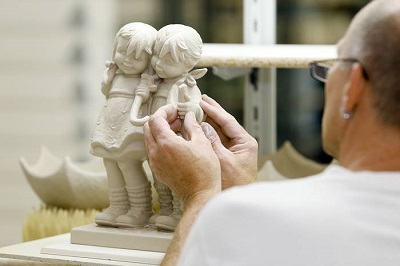
Master sculptures will use Sister Maria Innocentia Hummel’s art works as the source of inspiration for their designs. There are some designs that are only based on a piece of art, while others have been taken directly from the art work itself.
Using the skills that they had honed through years of experience. Master sculptors such as Arthur Möller and Reinhold Unger, would use these two dimensional images to build three dimensional clay sculptures. The level of detail that went into each sculpture was both breath taking and inspirational. Every curve, every crease and tuft of hair was lovely sculptured into the features of each model. The likeness between these models and the original art works was astounding.
Step 2) Artistic Approval
Prior to Sister Maria Innocentia’s death in 1946, she had retained artistic control over the Hummel figurines final design. Today the artistic control is decided by an Artistic Board at the Convent of Siessen. Using the same strict guidelines set by Sister Maria Innocentia, the board critiques each and every new design and remodeling of the Hummel figurines.
The sculptors would adjust their design accordingly before seeking the boards approval again. This process would continue back and forth until the board was happy with the end result. If a model failed to pass this process completely. It was either abandoned or started over from the beginning. Thus ensuring that only the highest quality of designs were produced, and that each Hummel was true to Sister Maria Innocentia’s vision.
Step 3) Mold Making
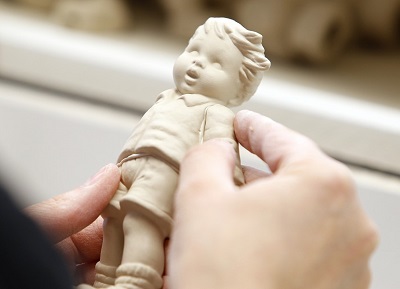
Once the artistic board had approved the clay model’s design. The Master Sculptor worked with a Master Moldmaker, to determine where the figurine should be cut and joined. Each Hummel could contain as many as 40 pieces or more. So once the best join locations had been decided, the Master Sculpture would cut the clay model into the required parts for the Master Moldmaker.
Using plaster of Paris, the Master Moldmaker would pour the mixture over the clay pieces, making a master mold for each and every piece of the Hummel. From here a series of positive and negative molds are made, resulting in a durable master working model to be made out of acrylic resin.
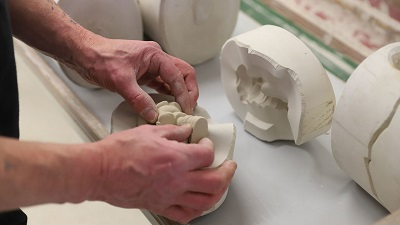
This master working model is key to making future molds should one get broken or damaged, or if it was to wear down from over use. By storing this model in a safe location, every time new mold was correctly made. It would have the same proportions and details as the molds made before it. This makes master working models very important, there for valuable. As losing the master working model, would mean having to start from the very beginning with clay models, to ensure that the highest quality parts are made.
Step 4) Quality Approval
To ensure that time and materials are not wasted, a test sample was produced using the newly minted molds. These samples must first past in-house QA testing, before being sent to the Convent of Siessen to be approved by the Artistic Board. These samples were presented to the board, looking just as the final product was intended to be. Sometimes there were several color schemes for the board to pick from.
Step 5) Casting
If all went well, and the Artistic Board approved the figurines quality of production. Then casting would begin on a much larger scale. The molds would have a liquid slip poured into them. Slip is a substance comprising of kaolin, feldspar, clay, quartz, and water, and when it cures, it forms porcelain.
Step 6) Assembly
After the pieces have set and hardened. They are joined by using more slip to bind the pieces together like glue. The excess slip around the joins was then smoothed over to both concealing the join line, and to removing any visible seams.
Step 7) Firing/Curing
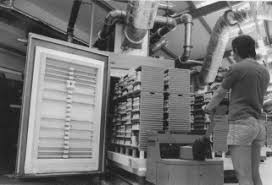
The figurines are placed in a kiln, a total of three times. The first time, firing is done at 2100°F. This cures the soft porcelain, hardening it and shrinking the size of the figurine, leaving a white powdery finish.
Step 8) Glazing
Following the curing process, the figurines are dipped into a tinted liquid glaze, ensuring that every inch of surface space, inside and out, is coated in glaze. Additional coats are applied with a spray before the figurines are placed back in the kiln, and fired at 1870°F. Glazed figurines that have yet to be painted are known as blank figurines. They are white and coated with a transparent skin of glass.
Step 9) Storage
Blank porcelain figurines are stored to be painted at a later date. They have the applicable Hum number for that specific model incised onto their base, but carry no trade marks. The trade mark is only applied once the coloring has been done. This means that there are some over laps between when a Hum number says it was made, and when a trade mark was used. In the event of a Hummel having a Hum number that predates the trade mark, it’s age is to be based on the trade mark and not the Hum number.
For more information about Hum numbers and trade marks, please read our articles – How to Understand the Hummel Numbering System, and Find out the Age of Your Hummel Figurine.
Step 10) Coating and Decoration
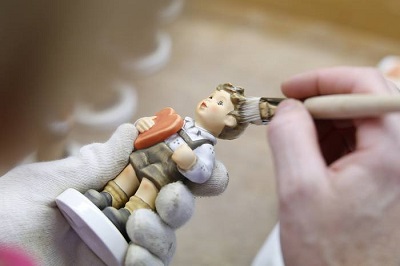
The Goebel painters had access to a color pallet of more then 200 colors, all of which were hand picked by Sister Maria Innocentia Hummel, herself. The paints are made of metallic oxide powders, mixed with balsam oil and turpentine. There are also some rare white glazed figurines that release in limited volume.
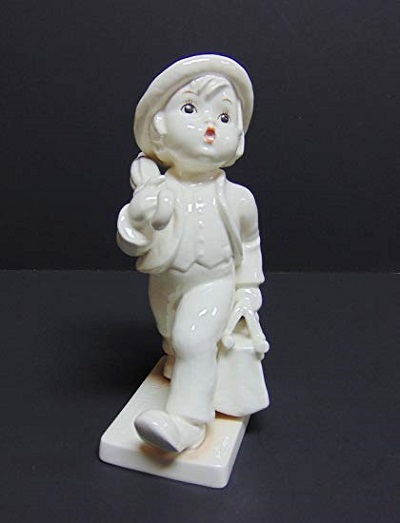
As part of the quality approval process, the Artistic Board approved each and every color scheme used, as well as each amendment done to later models. With the go ahead from the board, painters would painstakingly paint every Hummel by hand. Every line, every blended shading and pattern was painted by a skilled artisan.
The faces were painted last, even on the white glazed figurines, and were painted by highly skilled, specially trained artist. These artist would only paint the faces, giving each figurine that little spark of life. Trademarks were stamped onto the base and set aside to await the final firing.
After the painted figurines had dried, they were placed in the kiln one last time. Baked at 1407°F, this fused the colors into the ceramic’s surface.
Leave a Reply